Route 53
You should get the IP address of your instance and save it somewhere before this. You will see why soon.
Navigate back to your AWS homepage, the one you just landed on when you logged in (click the AWS button in the top left corner).
Now is the time for us to configure our domain names (or subdomains) so that we can actually see our site. Our reverse proxy needs the domain name to link our actual site to the name, and without that, our deployment will not work (there is a long story why, if you want to know please ask!).
We use domain names to point text towards our IP’s that are hosting our servers. The process is called DNS resolution.

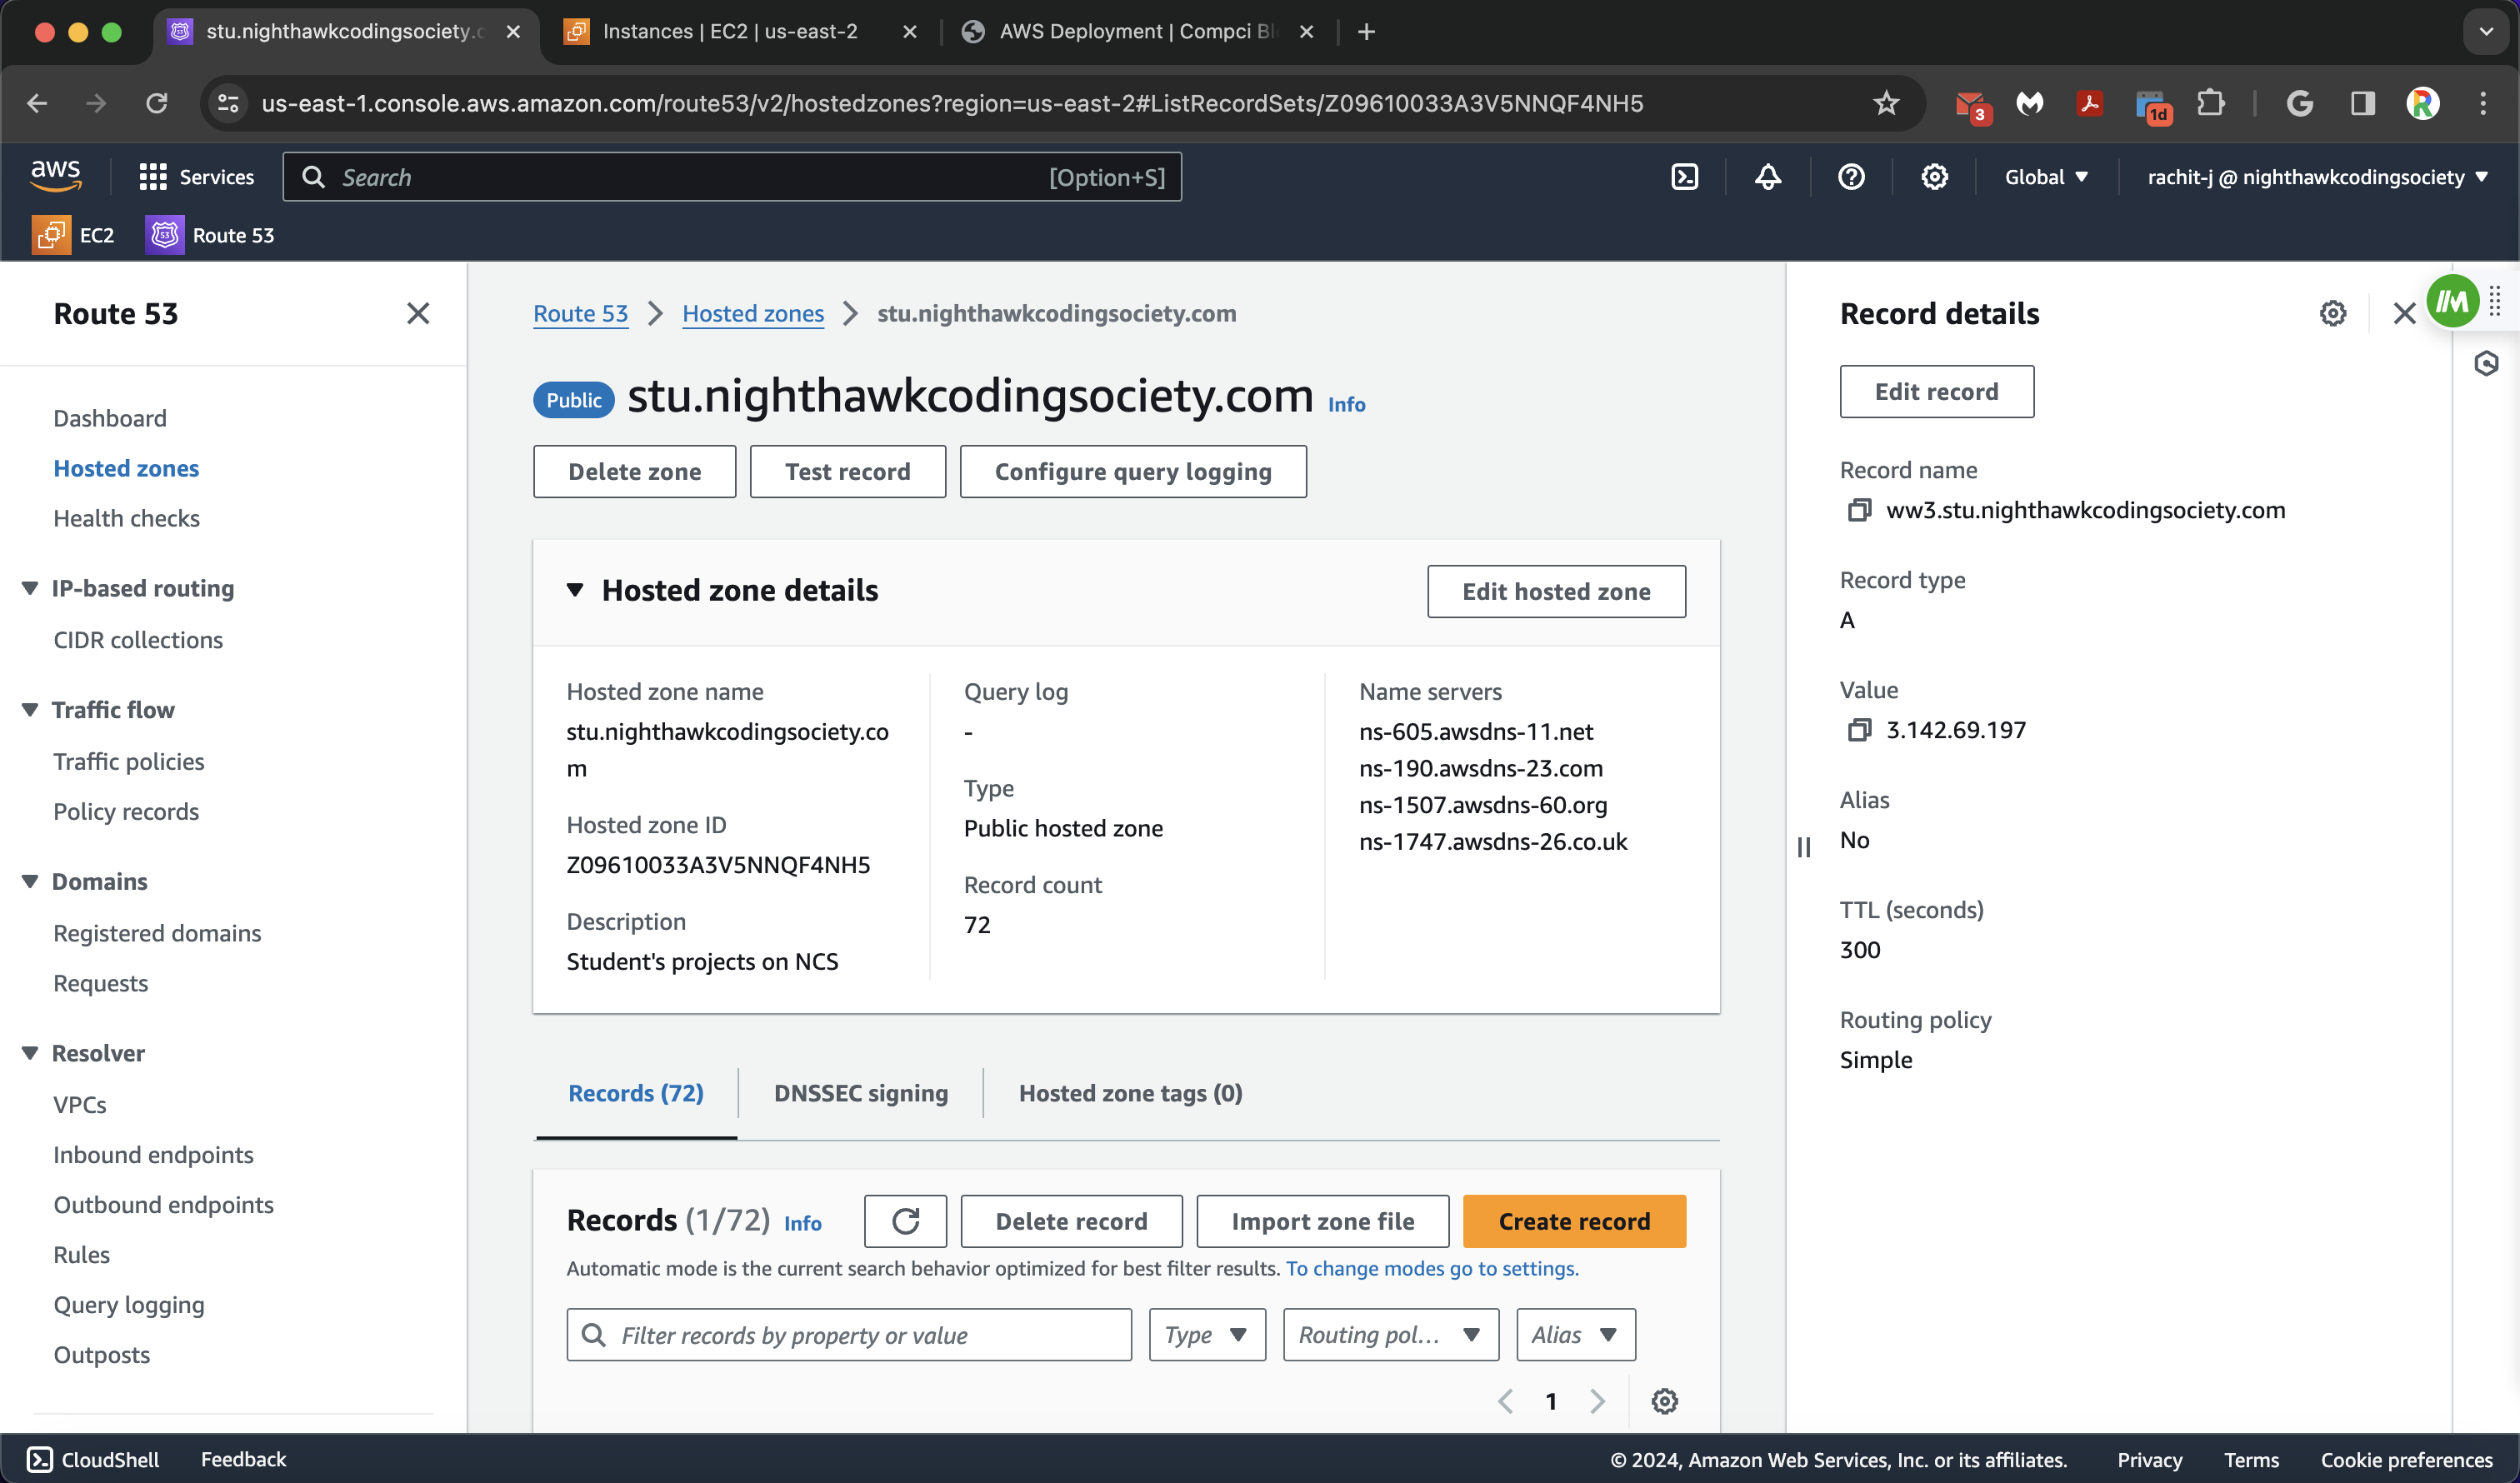
AWS Route 53 allows us to take one domain and split it into multiple domains while linking them to our EC2 instances by the IP Adresses and the nginx configuration of the instances.
First, we go to the search bar and search “Route 53”. We then click on it (I would also star it) so it takes us to the Route 53 Homepage.